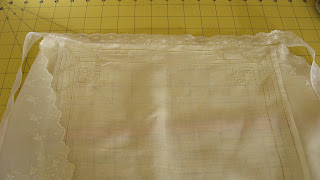
Wednesday, March 27, 2013

Washing Vintage Linens

Victorian Whites
 I love that fresh air smell of laundry that has been line dried! I hand wash and line dry all my vintage linens.
If the linens don't have any spots or stains that I'm trying to remove I just hand wash with a mild detergent, rinse thoroughly (I usually rinse at least twice) and line dry.

When I find linens at the thrift store or a yard sale they usually have a few spots or have yellowed. First I soak them in laundry detergent with a little oxygen booster added.  After a few hours I rinse them thoroughly and line dry. If any spots remain I put lemon juice and salt on the stained areas and hang in the sun for several hours. I rinse thoroughly and line dry again.  

If any stains remain my next step is non-chlorine bleach added to the soaking water.  I try to stay away from chlorine bleach as it can break down the fragile fibers of the linens and cause little holes to appear in the worn areas.  


When you have finally removed all the stains (some stains just won't come out) and your linens are dry, it is time to iron them.  I starch and iron all my linens to give them a nice smooth, crisp feeling.  If you don't want to use starch you can mist with water and then iron. Now they are ready to either sell or add to my linen closet!  


 Linking with:
 The Scoop at Cedarhill Ranch
 Blissful White Wednesday at Timewashed
 Shabbilicious Friday at Shabby Art Boutique

Sunday, March 17, 2013

Hankie Apron Tutorial


For this project you will need 3 hankies of similar
size that look nice together.

One will be used for the body of the apron.

One will be cut diagonally and used for the sides.

Another will be cut in half and used to make a ruffle across the bottom of the apron.


Arrange the hankies and decide which one you want to use for the body etc.

I used a rotary cutter to cut the hankies as shown below.


Cut one diagonally for sides.


Cut one straight across the middle to make the ruffle.


Version 1: 
If the sides are cut from a hankie that is smaller than the body hankie (like the one I used) center and pin sides to body right sides together.
 
Straight stitch leaving a 1/4" seam allowance. Finish raw edges to avoid fraying. I used  a simple zig-zag stitch for finishing but you can use whatever you want to.


There may be protruding ends where the sides are a little longer than the body. Clip these off so that the apron is even across the top and bottom.


Press seams toward body of apron.


 Stitch the two pieces that you cut for the ruffle together to form a long strip (right sides together, 1/4" seam allowance).

Using a basting stitch sew 1/4" in from edge. Pull threads to gather. Matching center fronts pin ruffle to apron right sides together.


Stitch using 1/3" seam allowance. Finish raw edge. Press apron.


Version 2:
If the sides are cut from a larger hankie attach the ruffle before pinning the sides to body. Then pin the sides to body and sides of ruffle, lining everything up at the bottom. Sew  


Attach ribbon, lace or bias tape to apron top to tie the apron with.

And you're done!!


This one is for sale in my Etsy shop.

WhatGirlsLike


Linking up with:
Pearls and Lace Thursday at Faith Grace Crafts


Monday, March 4, 2013

My Love of Vintage Hankies


I've loved vintage hankies since I was a little girl. Sometimes when I was sick my mom would get out the satin glove box she kept her hankies in and let me take them all out and look at them. When I grew up I started my own collection. 


Vintage hankies come in a variety of fabrics including linen, fine cotton and silk.


Some have bright floral prints.

 
Others have added embellishments such as handmade crocheted or tatted lace, hand embroidery or pulled thread open work.

 
They are small, easy to store and relatively inexpensive making them a perfect item to collect.
 
Hankies can be used is so many ways!

Over the next few weeks I'll be talking about how to use hankies in decorating and sewing projects.